Sunday, December 7, 2008

Lesson 11 - Custom Textures

Now I am going to show you how to make Custom Textures. There is probably more than one way to make textures. There are a lot of tutorials online. I found them to be very complicated. They say something about using a program called Vtex. I have tried to use that program but it never worked for me.

If you are New to Mapping Click this link and start at the beginning.

(The easiest way to make textures is to use VTF edit, get it from the links below, on this page!!
just click file/import, import the pic, save it as .VTF, click tools/make .vmt, restart hammer and you're done.)

or you can do it the complicated way.

In order for you to do this correctly. The need to be able to see file types. You know, ( .jpg , .bmp , .txt , .mp3 , ect.)


To do this, open any folder. Click on tools, go down to folder options.
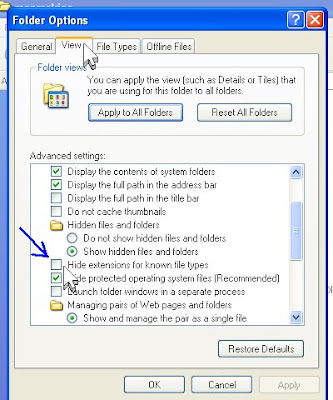


In the "folder options" dialog box, click on the "view" tab. Look for the box that says, "hide extensions for known file types". Take the checkmark out of this box. Click OK. Now you should be able to see file extensions.

NOW you need to download an editing program. One called VTFedit and also .NET Framework . VTFedit will not work without .NET Framework. You need to install .NET Framework before you install VTFedit.
You can get .NET Framework from Microsoft. Click on the link below. After you install .NET Framework you will have to reboot your computer.
.NET Framework
You can get VTFedit from here. look for "Installer (850 KB)"
VTFedit
Install .NET Framework.
Install VTFedit
Now we need to convert your pic file into a .vtf - (Valve Texture File)
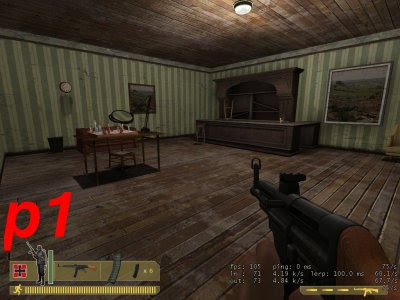

I will show you how to make a custom texture, using the custom spray feature, in DOD source. This is a typical DOD room. (See p1)
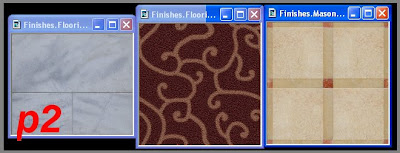

First, you need to select the textures you wish to use. (see p2)


You have to make sure the photographs you wish to use are the correct sizes. They have to be 256, 128, 64, 32, 16, 8, 4, or 2 Pixels wide.
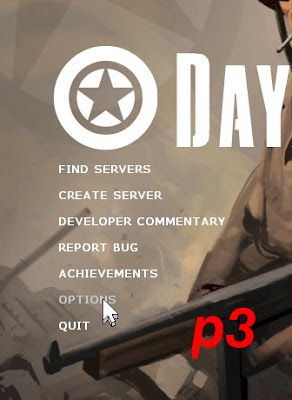

Then you need to open DOD, to the game menus. And select options. (see p3)
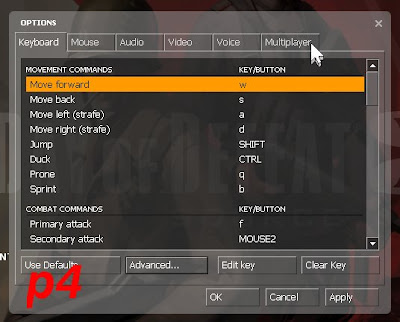

Then click multiplayer. (See p4)
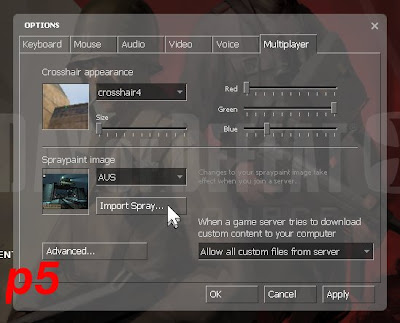

Then click import spray. (See p5)
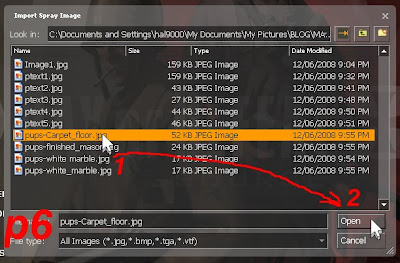

Browse to where the picture is that you want to make a texture out of. Select the picture, then click open. (See p6)
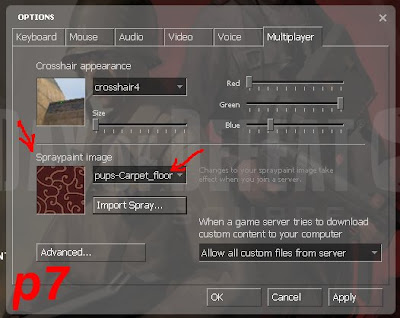

After that, you should see the image you selected appear in the window called "spraypaint image". (See p7)
If you see that, then you are ready for the next step.
We need to find, on your computer, the texture files we just created. To do this, you need to take note of the name of your texture file. My texture in this example is called, pups-carpet_floor. (See p7)
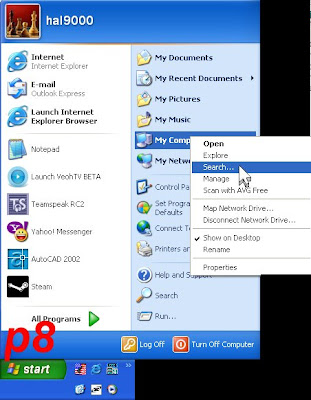

Click the start button. Right click on "My Computer". Select search. (See p8)
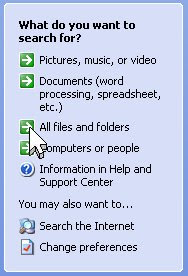

Click All files and folders. (See P9)
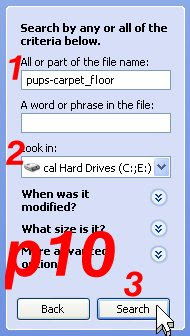


Search for the name of the texture, you just made the spray out of.
1. Insert the name of your spray.
2. Make sure it says search local hard drives.
3. Click search
(see P10)
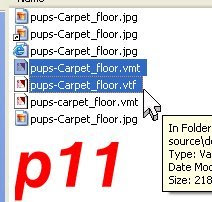

You should have 2 files. .vmt and .vtf (See p11)
.vtf file -is the picture
.vmt file -contains the information about the texture, like is it wood, is it metal, so steam knows whether to show sparks or splinters when your texture is shot that type stuff. It also contains information about where the texture is located. And because we are going to move these files. We have to edit the location.
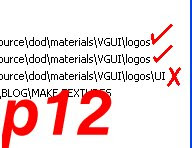

In my example p11 you can see more than two files. The ones we are concerned with are the ones in the logos folders. Not the logos/ui folder. (See p12)
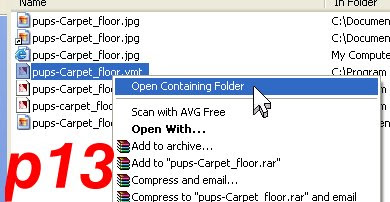

Right click on the correct file, and select "Open Containing Folder". (See p13)

This will bring you right to the logos folders, where the texture you just created is located.


Select your two files, and hit "ctrl c". To copy them to the clipboard. (See p14)
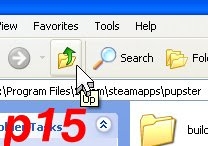

Click the "up folder" button two times. (See p15)
you should be in the ...\day of defeat source\dod\materials folder.

You need to create a folder, in this folder. Usually it will be the same name as the name of your map. But for this lesson, to keep it simple, I'm going to name my folder SB.

...\day of defeat source\dod\materials\sb
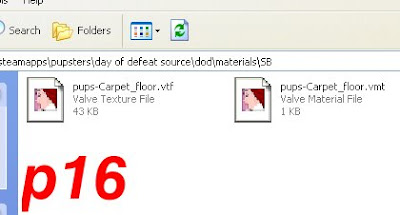


Open the new folder you created, and click ctrl-v, to paste the texture files. (See p16)
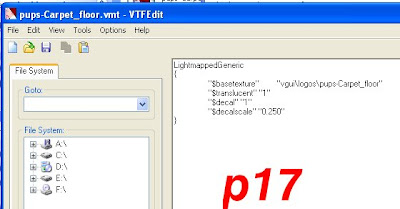


Now open the .vmt file in VTFEdit. You should see something that looks like this. (See p17)

The line that says "$basetexture" is the file location.
and The line that says "$decal" is some setting.
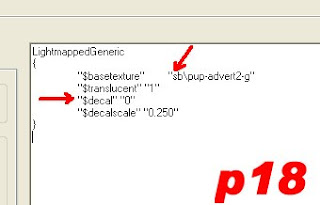

We have to change "$basetexture" , to reflect the new location that we moved our textures to. Also we have to change "$decal" from "1" to "0", so your texture will not be transparent. (See p18)

Change it.
Save it, and close it.

Now you should be ready to open Hammer and apply your new texture.
You might have to restart Hammer. If it's open.


I went ahead and added some more custom textures, the same way as I did the last.

One more thing you need to know, for your map to work right on your server. You will need to upload your "map file" with a ".res file".
A .res file is just a text file that tells the server where to find and download the custom textures to clients, when they join your server.

Also, a .res file should have the same name as your map file.
Example: if your map's name is "dod_further.bsp" then your .res file should be named "dod_further.res"

And you place the .res file in the same folder you place your map's on your server.
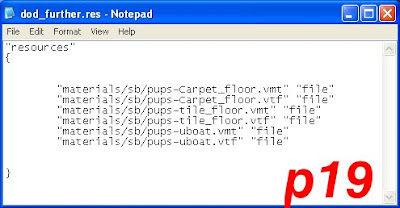

This is what is in a .res file. (See p19)

And you need to make a folder on your server just like the one you made on your computer.
...\day of defeat source\dod\materials\sb
and place your textures in that folder, so people can download them when they join.
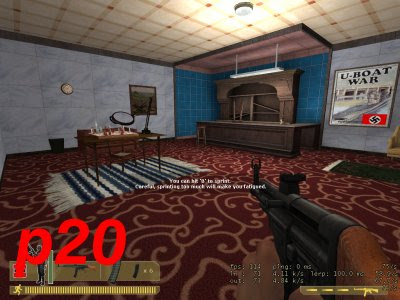


I went ahead and added some more textures, and a World War II picture I downloaded off the Internet. Just to show you an example of how you can get a totally different look. (See p20)

Note: all the texture files you create using this lesson, will be created in the logos folder. So if you plan on making alot of textures, you should make a shortcut to that folder on your desktop. Then you will not have to search for the texture every time you create a new one. Or you can just browse to that folder if you like.

(Note: you do not have to do the following procedure if you're going to use .res file.)

Additional: if you are an advanced mapper, then you can take it one step further. You can eliminate the need for a .res file, by embedding your texture files into your .bsp after it is compiled.

Here is what you need, to avoid missing textures, which show up as pink checkerboards.
What you'll need:
you'll have to install java runtimes,
You can get them here.
Java Runtimes
PakRat for Source - http://www.geocities.com/cofrdrbob/pakrat.html
PakRat is a post compile process for embedding your custom materials into your map. If you need instructions on how to run Packrat , then follow the instructions on their web page. Or you can do what I tell all my friends, "Google it!"- I said you can use this if you are an advanced mapper.

I have never used it. So I can't answer your questions about it.

GOTO Lesson 12 - Advanced Displacements

Sunday, July 13, 2008

Lesson 10 - Ladders

Ladders


To make a ladder in Hammer for DOD:s is very simple, compared to the way the teach you in all the tutorials you'll find on the web.

If you are New to Mapping Click this link and start at the beginning.

I know for a fact how difficult it is to find a good tutorial on how to make a ladder.

You draw a brush, in the shape of a ladder. Hit Ctrl-t. Select func_ladder from the pulldown menu. click apply, click cancel.


A Quick way to line up textures, is draw a brush in the shape of a ladder. Usually about 16 units wide, and 2 units thick. You can make the ladder as tall as it needs to be.
(see pic 1).


Then I copy that ladder and paste right next to it. And shrink it down to about 24 units. The smaller one is just so that we can set up the texture in one quick sweep.(see pic 1).

Then go to the texture tool, click browse, type ladder in the filter, select the ladder texture.


Apply the texture to the small brush. (see p2) notice how funky it looks. I'm going to teach you a quick way to line up the textures, without wasting any time.


After you paste the texture to the small brush, left click on the face of it to select it. (see p3)


Then click the fit button on the texture dialog box. (see p4)


Hammer will line up the textures for you.(see p5)


Now all you have to do is copy the texture from the small brush to the tall brush. Left-click on the small brush to select the texture, then right-click on the tall brush to apply that texture.(see p6)


The texture still needs to be shifted a little. Right click on the tall brush's face to select it. Then use the "X" Axis under "texture shift", on the texture dialog box. To slide the texture over, until the ladder looks correct. (see p7)


After you get the texture lined up, you can delete the small brush because we don't need it any more. Using the select tool, select the large brush to make it active." (see p8)


After selecting the large brush click Ctrl-T, from the drop-down menu select func_ladder, click apply, click cancel. (See p9)

So that's basically it. You draw a brush, in the shape of a ladder. Hit Ctrl-t. Select func_ladder from the pulldown menu. click apply, click cancel. And you can put any texture on the ladder that you want. You can even use the invisible texture (type tools in the filter. Look for the texture called invisible.) to make an invisible ladder.


Once you create your first ladder, you will agree with me how easy it is to make a ladder.

Don't forget to texture the other sides of the ladder and Topside also.


What if you had a model of a ladder? You want to make this ladder work.(see p11)

Using the ladder texture you need to draw a thin brush in front of the model.(see p12)
(note: ladder texture is a tool texture. Type tools in the filter.)

As you can see from the TopView, the brush is not touching the model.(see p13)


Select the Ladder Brush, Click "Ctrl-t", from the Pulldown Menu, Select "func_ladder". Then Click "Apply"(see p14)


And that's it. When you compile the map, the ladder texture will be invisible,(see p15,) So it will appear as if you're climbing up the model. And that's how you make these types of ladders work.

Goto Next Lesson Click Here

Friday, June 27, 2008

Lesson 9 - Map lighting - Sunset and Night

Map lighting, lights, light_env, env_lightglow, light_spot, point_spotlight

If you are New to Mapping Click this link and start at the beginning.


Lighting your map is very important. You can control the time of day. You can even make it night.

Let me illustrate how Hammer interprets lights.


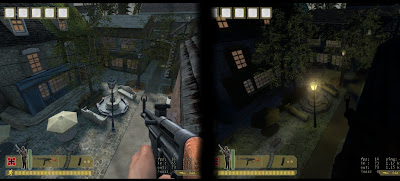
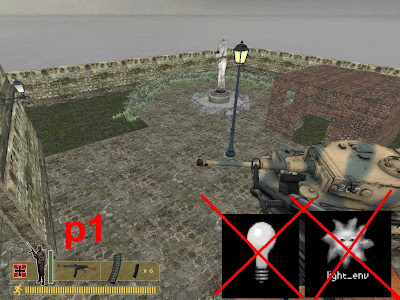
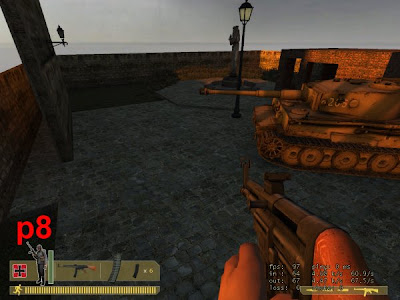
If you do not have any lights, or a light_env. Then your map will be flat, with no shadows, and the insides are lit the same way as the outsides.(see p1)


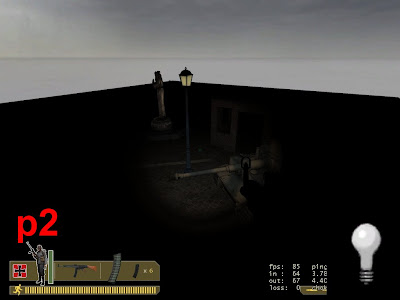
If you have a light in your map but you do not have a light_env. Then your map will be totally dark.
(Except where you put a light)(see p2)


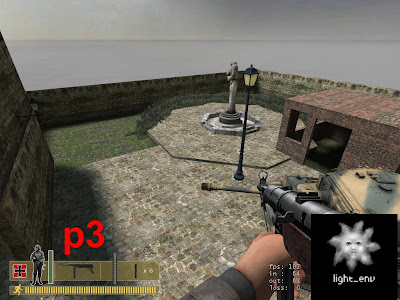
When you do have a light_env in your map, then your map looks correct. The outsides are bright. The insides are dark. And you can see shadows. It looks much more realistic.(see p3)

Adjusting light settings

If you don't know where to get your light_env then .click here and read (near p52)adding sunlight. Then use your back button to get back.


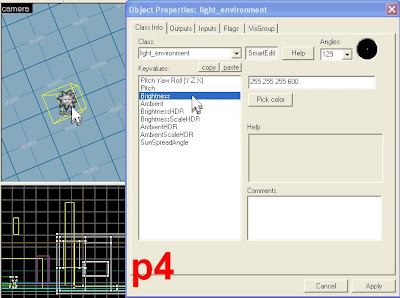
Double-click on light_env. On the "object properties" dialog box, click on brightness.(see p4)


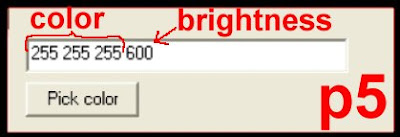
To the right, you will see some numbers. The first three set of numbers represent the color. The fourth set of numbers is the brightness.(see p5). Default brightness is 200 I set mine to 600 to make it bright. You can change the color by clicking pick color. That's pretty much self-explanatory. Picking a color does not affect the brightness.


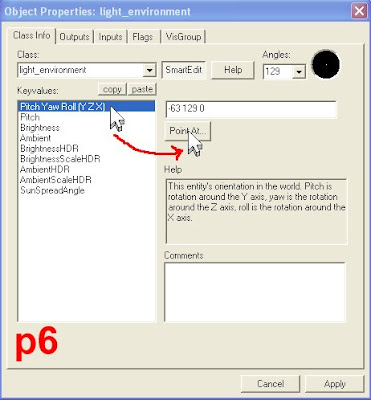
You can change the angle that the sunlight will fall by clicking "pitch yaw roll", then clicking "point at" (see p6)
your mouse pointer will turn into a "target scope" that is used to set the angle by clicking somewhere in your map.


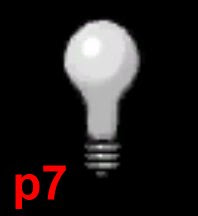
You can also Control the brightness and color of the light bulbs. (see p7) the same way.


To make my map look like sunset, I changed the color of my light_env to orange. I left the brightness at 600. And then I set the angle real steep to make the shadows longer just like in real life.(See p8)


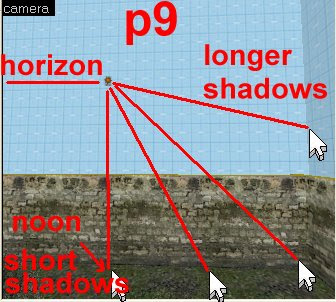
The angle is set depending on where you click and where the light_env is. (see p9)
if my light_env is right there and I click directly underneath it, then we have the noontime sun, with very short shadows. And as you swingout the the lengths of the shadows increases with the angle.

Making your map nighttime.

To make your map nighttime, you have to delete the light_env. Then add the moonlight in by hand.


To make realistic moonlight use the little light bulbs. You want to place it in your map, double-click on it to bring up the properties dialog box.(see p10) Notice in the sample how high off the ground that I placed my light. It's about three feet above the light pole.


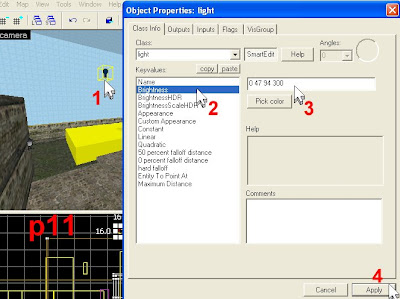
Then double-click on the light. In the properties dialog box click on brightness.Use these numbers 0 47 94 300. Put those numbers in the text field, then click apply. The light bulb should have change colors.(see p11). It looks black but it's a cool blue. Makes perfect moonlight.


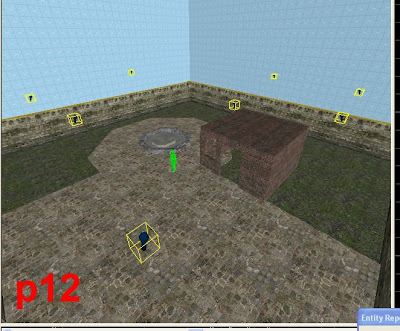
Once you set up the light bulb. Simply copy and paste it all over the map where you want to moonlight to shine.(see p12)


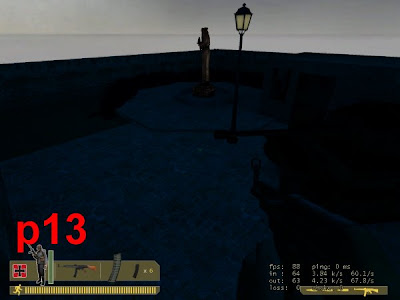
Compile the map it should look something like my sample (see p13) you can control the brightness of the moonlight by using the techniques above, and changing the 300 to a higher number.


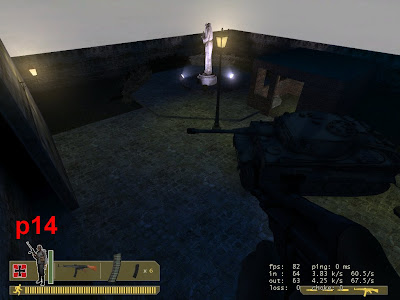
Don't forget to add normal lighting inside your houses and buildings. And you can add outside lighting such as in my example.
(see p14)

Examples of the outdoor lighting models used in this example.

The light pole.
models/props_urban/lights_streetlight01_on.mdl
env_lightglow
2 light_spot

A lot of the lighting fixtures have two models of the same thing. Some use skins. One of them is turned on, and one of them is turned off. This light pole has two models so use the one that is lit.


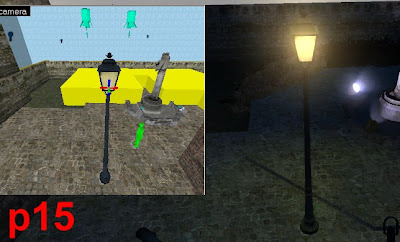
I use the env_lightglow to add a glow to the light that kind of foggy haze that you see around lights at night. The light_spot is the same thing as a spotlight, and you can adjust the brightness and angle on the spotlights just like the light_env. Arrange them like I did in my sample. (see p15)

The wall mounted light.
models/props_urban/light_fixture01.mdl
env_lightglow
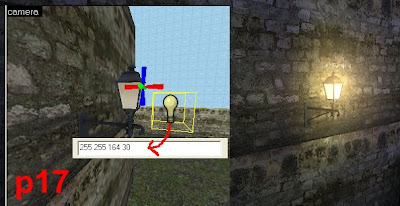
light (set at 255 255 164 30)


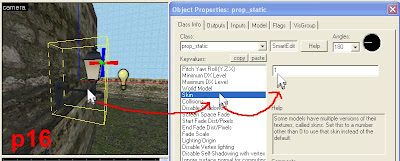
Most outdoor fixtures have two models. But this one uses skins. Some models have more than one skin. Double-click on the light fixture, click skin change into 1, click apply.(see p16) It changed the skin to the nighttime model. Some skins change to snow/non snow. But for lights it's usually on and off.


Put a light entity in front of the model and a env_lightglow also just like in the sample.(see p17)

(env_lightglow property settings.
Parent - blank
name - blank
pitch yaw roll - 0 0 0
color - 255 208 128
vertical size - 30
horizontal size - 30
maximum distance - 50
minimum distance - 200
outer maximum distance - 700
glow proxy geometry size - 15
HDR color scale - 1.0)

The stage spotlight.
models/props_wasteland/light_spotlight01_lamp.mdl
(for this model skin 0 = on and skin 1 = off)
point_spotlight
light_spot


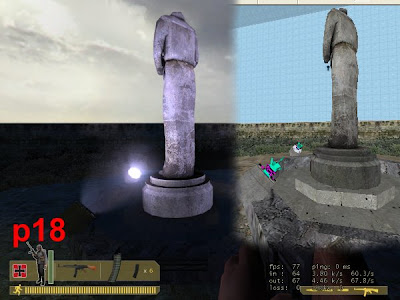
The same deal. Place them in your map use the "pitch yaw roll" to point the model at the statue. Then copy and paste the numbers you get for the "pitch yaw roll" of the model into the "pitch yaw roll" of the point_spotlight and the light_spot. That way we can be sure that they are all pointing in the same direction. Then line them up neatly like I did in my example. (see p18)

Have fun, but remember not to make your map too dark, because it's not fun if you can't see. Sure we have flashlights, but no one wants to use them. Maybe if there's a darkroom, yeah. But not during the whole map/game.


Note: when placing lights inside buildings you should not make the lights too bright just think of the numbers as Watts. 100 watts is bright enough 60 watts 30 watts and 20 watts the're all good for inside lighting.(example: 255 255 255 30 = 30 watts light bulb)

GOTO Lesson 10