If you are New to Mapping Click this link and start at the beginning.
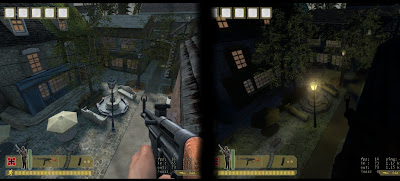
Lighting your map is very important. You can control the time of day. You can even make it night.
Let me illustrate how Hammer interprets lights.
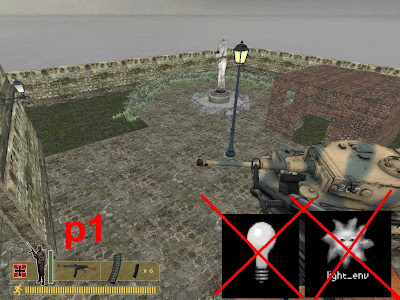
If you do not have any lights, or a light_env. Then your map will be flat, with no shadows, and the insides are lit the same way as the outsides.(see p1)
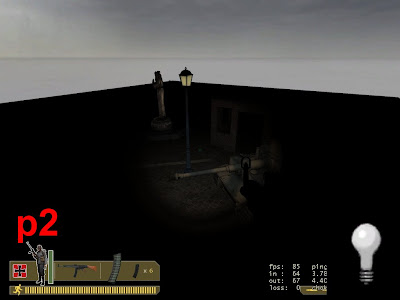
If you have a light in your map but you do not have a light_env. Then your map will be totally dark.
(Except where you put a light)(see p2)
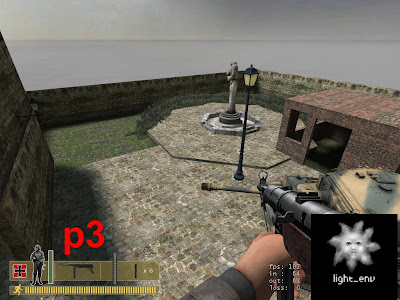
When you do have a light_env in your map, then your map looks correct. The outsides are bright. The insides are dark. And you can see shadows. It looks much more realistic.(see p3)
Adjusting light settings
If you don't know where to get your light_env then .click here and read (near p52)adding sunlight. Then use your back button to get back.
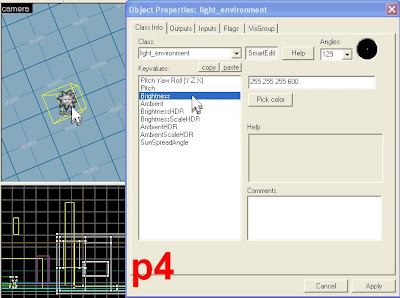
Double-click on light_env. On the "object properties" dialog box, click on brightness.(see p4)
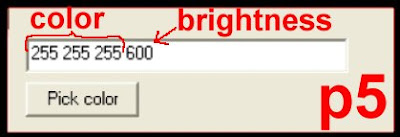
To the right, you will see some numbers. The first three set of numbers represent the color. The fourth set of numbers is the brightness.(see p5). Default brightness is 200 I set mine to 600 to make it bright. You can change the color by clicking pick color. That's pretty much self-explanatory. Picking a color does not affect the brightness.
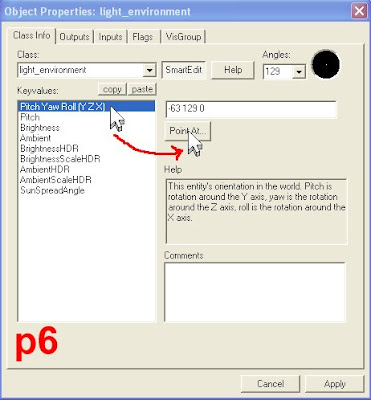
You can change the angle that the sunlight will fall by clicking "pitch yaw roll", then clicking "point at" (see p6)
your mouse pointer will turn into a "target scope" that is used to set the angle by clicking somewhere in your map.
You can also Control the brightness and color of the light bulbs. (see p7) the same way.
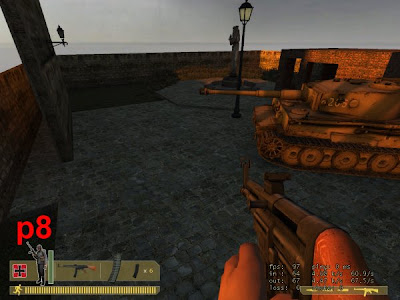
To make my map look like sunset, I changed the color of my light_env to orange. I left the brightness at 600. And then I set the angle real steep to make the shadows longer just like in real life.(See p8)
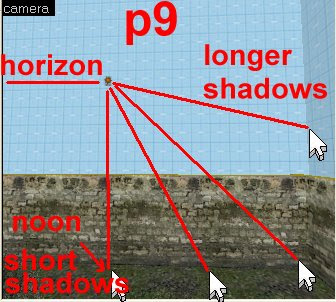
The angle is set depending on where you click and where the light_env is. (see p9)
if my light_env is right there and I click directly underneath it, then we have the noontime sun, with very short shadows. And as you swingout the the lengths of the shadows increases with the angle.
Making your map nighttime.
To make your map nighttime, you have to delete the light_env. Then add the moonlight in by hand.

To make realistic moonlight use the little light bulbs. You want to place it in your map, double-click on it to bring up the properties dialog box.(see p10) Notice in the sample how high off the ground that I placed my light. It's about three feet above the light pole.
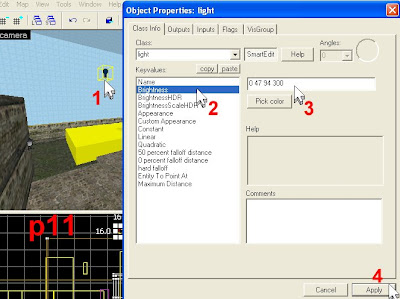
Then double-click on the light. In the properties dialog box click on brightness.Use these numbers 0 47 94 300. Put those numbers in the text field, then click apply. The light bulb should have change colors.(see p11). It looks black but it's a cool blue. Makes perfect moonlight.
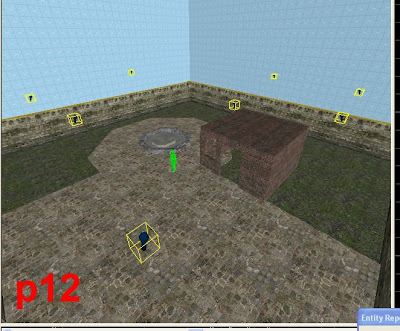
Once you set up the light bulb. Simply copy and paste it all over the map where you want to moonlight to shine.(see p12)
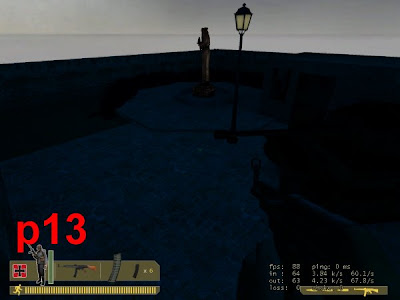
Compile the map it should look something like my sample (see p13) you can control the brightness of the moonlight by using the techniques above, and changing the 300 to a higher number.
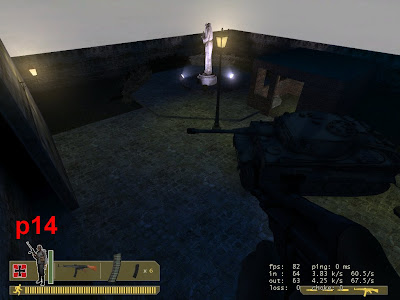
Don't forget to add normal lighting inside your houses and buildings. And you can add outside lighting such as in my example.
(see p14)
Examples of the outdoor lighting models used in this example.
The light pole.
models/props_urban/lights_streetlight01_on.mdl
env_lightglow
2 light_spot
A lot of the lighting fixtures have two models of the same thing. Some use skins. One of them is turned on, and one of them is turned off. This light pole has two models so use the one that is lit.
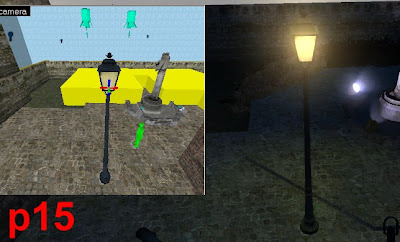
I use the env_lightglow to add a glow to the light that kind of foggy haze that you see around lights at night. The light_spot is the same thing as a spotlight, and you can adjust the brightness and angle on the spotlights just like the light_env. Arrange them like I did in my sample. (see p15)
The wall mounted light.
models/props_urban/light_fixture01.mdl
env_lightglow
light (set at 255 255 164 30)
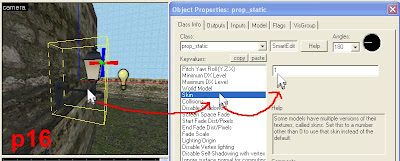
Most outdoor fixtures have two models. But this one uses skins. Some models have more than one skin. Double-click on the light fixture, click skin change into 1, click apply.(see p16) It changed the skin to the nighttime model. Some skins change to snow/non snow. But for lights it's usually on and off.
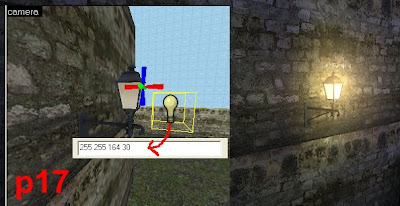
Put a light entity in front of the model and a env_lightglow also just like in the sample.(see p17)
(env_lightglow property settings.
Parent - blank
name - blank
pitch yaw roll - 0 0 0
color - 255 208 128
vertical size - 30
horizontal size - 30
maximum distance - 50
minimum distance - 200
outer maximum distance - 700
glow proxy geometry size - 15
HDR color scale - 1.0)
The stage spotlight.
models/props_wasteland/light_spotlight01_lamp.mdl
(for this model skin 0 = on and skin 1 = off)
point_spotlight
light_spot
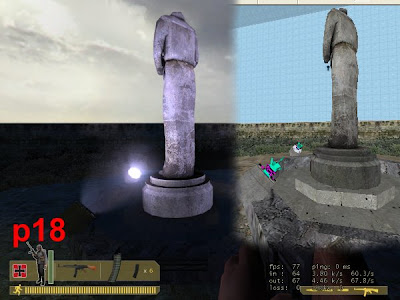
The same deal. Place them in your map use the "pitch yaw roll" to point the model at the statue. Then copy and paste the numbers you get for the "pitch yaw roll" of the model into the "pitch yaw roll" of the point_spotlight and the light_spot. That way we can be sure that they are all pointing in the same direction. Then line them up neatly like I did in my example. (see p18)
Have fun, but remember not to make your map too dark, because it's not fun if you can't see. Sure we have flashlights, but no one wants to use them. Maybe if there's a darkroom, yeah. But not during the whole map/game.
Note: when placing lights inside buildings you should not make the lights too bright just think of the numbers as Watts. 100 watts is bright enough 60 watts 30 watts and 20 watts the're all good for inside lighting.(example: 255 255 255 30 = 30 watts light bulb)
GOTO Lesson 10


No comments:
Post a Comment