Leaks, Select Tool, Carve Tool.
Ignore Groups Button
In this lesson you will learn about leaks, and more things we need to know about the Select Tool. Also I will introduce you to the Carve Tool. So let's get started.
Leaks, are important to know about. It is also important to know how to find them. A leak is caused by a hole in your map or by placing an entity on the outside of your map. A leak is an error created when Hammer cannot tell the difference between the inside of your map, and the outside. You want to eliminate leaks because they cause all kinds of funny things to happen. So the best way to see what a leak is, and how to fix it, we need to create one.
Before we create an artificial leak. I should teach you about the Select Tool. Because we are going to use the Select Tool to create the leak, and also to fix the leak. Open Hammer. Go to File and click new. Or hit Ctrl-n to open a new map file. As always, after opening a new map click on the "-" tic-tac-toe to make the grid smaller. I click it about six times. I move all those dialog boxes to the right of the screen. And I hit Ctrl-a to Center all my viewports.
Click on the Texture Tool, click browse, type brick, select a brick texture.
Now click on the Block Tool. In the Top View viewport draw a square 200x 200. And hit Enter.
You just made that solid. Now click on the Select Tool. Now the brush you just created should be highlighted with the little white squares showing around the brush.
(see p1).
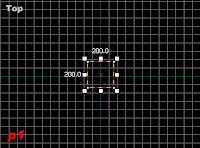
Those little white squares are called Grips. They allow you to do real-time editing. When you see the grips active, that means that brush or entity is selected. To "Deselect" an object, you can simply click on another object, or click in empty space or you can hit the ESC button.
Let's try that. Hit the Esc button. You just deselected your brush. It should look like a blue box.(see p2)
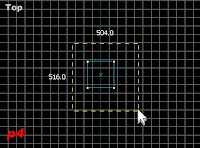
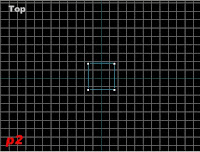 Now we need to select it again. There are several ways to select an object. Let's try them all. First one is, click near the outside of the blue brush and hold the mouse button down.(see p3) drag a yellow dotted line square around your brush(see p4)
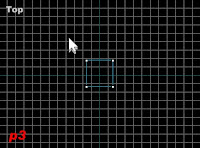
Then hit enter. As you can see your brush is now selected again.(see p1)
Hit Esc to deselect your brush. Another way to select your brush is by clicking on one of the blue lines or the little blue "x" that marks the center of your brush. Try that. That's how that works.
Select your brush. Center your brush in the Camera Viewport. You should remember how to do this from the previous lesson. Click on the "View" drop-down menu, go down to "Center 3-D views on selection" and click. Now we should see some yellow lines in the Camera Viewport.(see p5) Remember that is because we are inside of a solid object.
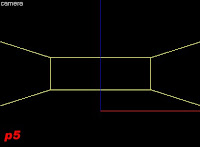 So to see our brush correctly, we'll use the mouse wheel to scrollback. Until your viewport looks like my sample in p6.(see p6). Take your time, I'll be here all day.
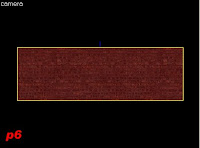
Now the last method of selecting a object is by directly clicking on it in the Camera Viewport. Let's try. Hit Esc to deselect your brush. Notice the yellow outline vanished. Now to select this brush again, just click on it in your Camera Viewport. Cool. I knew you could do it. In a populated map, this method is going to be the most common method used by you to select an object.
We will practice more later. After I show you how to use the Carve Tool. It is the icon that looks like a block with one of its corners cut off. Second from the bottom. Do not click on it yet. Just know where it is, so when I tell you to click on it, you will click on it. And I won't have to wait for you.
Your Camera View should look like my example in p6 (see p6). But for our lesson on how to use the Carve Tool, we should get a better view in our Camera View viewport. Using the W. A. S. D. keys and the Arrows on your Keyboard, fly around your camera view, until your view looks like my view in the sample
(see p7). Or something near to that.
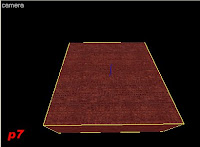 Where you can see the top, and one or two of the sides it doesn't matter.
With your brush selected, click on the Carve Tool. Place your mouse above your brush in the Top View viewport(see p8).
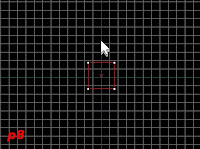
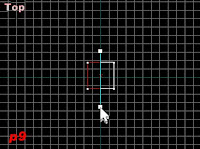 And drag it right through the center.
(see p9). Making it go straight up-and-down just like the sample. See the blue line you created, with two grips on each end. That is the line created by the Carve Tool, it shows you where you are about to slice the brush.
(We are making the slice right down the middle of the brush. If you make your "slice line" in the wrong spot. To reset it. You have to click on the Select Tool icon. Then click on the Carve Tool icon again.)
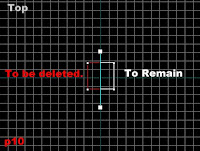
At this point, notice half of the brush is in Red and the other half is in white. Everything that is in red will be deleted. Everything that is in white will remain.(see p10). Just so we're clear, if you were to hit Enter right now half of the brush, the half that is red, would be deleted. And the white half would remain.
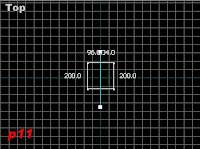
You can select which side of the brush you wish to keep. Just click on the Carve Tool icon again, and notice what happens in the Top View viewport. Each time you click on the Carve Tool icon, you toggle through the different selections. You can choose to keep the right side, you can choose to keep the left side, or you can choose to keep both sides. For our example, we need to keep both sides, so keep clicking the Carve Tool icon until both sides of your brush are white(see p11). Then click Enterto carve the brush.
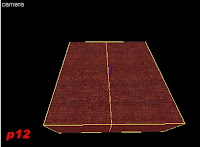
As you can see in the Camera Viewport your brush is now divided in two.
(see p12)(if you're slice, is not going the same direction as my slice. Don't trip. It doesn't matter. Just follow along and try and learn.)
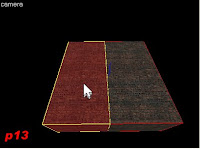
 You can tell its separated by clicking on the Select Tool icon.(red arrow) Then click the left side of the brush, in the camera viewport.(see p13) as you can see only half of the brush selected.
 And if you click on the right side, the right side will become selected.
 And the left side will automatically be deselected.
We need to have both sides selected, so we can carve them both at once. To select more than one item. You need to hold down the Ctrl key. This allows you to select multiple items. Let's select both sides of this block. Click the brush on the left side.( see p13 ) Press and hold down the Ctrl key. Then click the brush on the right side. Now both sides should be selected (see p14).
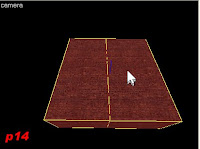
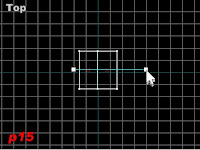
Now we are going to carve the brush again. So that there will be four pieces. The brushes that we wish to carve are selected. So now click on the Carve Tool Icon. Drag a carve line through the middle of your brush perpendicular to your first carve.(see p15). Hit Enter. You now carved your brush again. There should be a total of four pieces now. Click on your Select Tool.
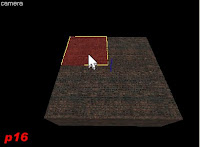
 In the Camera View viewport, click on the top left corner block.(see p16). And your Top View viewport should look like my example.(see p17). I will give you a little more information about the Select Tool.
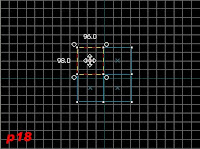
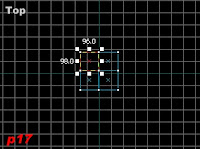 Now listen carefully, in the Top View viewport click on the brush that is already selected. And watch the grips change. When you first select the brush, the grips allow you to stretch. If you click on the brush, a second time the grips turn into little circles. Circle grips allow you to rotate the brush. (see p18).
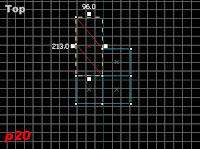
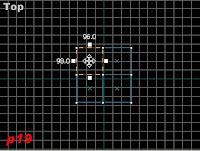 IFyou Click on the selected brush again. The grips change again. When the Grips are in the centers only, and not on the corners(see p19) these grips allow you to slide the block to distort it. (These grips come in handy, when creating slanted roofs)If you were to slide it it would look something like this(see p20). You can try it, just hit Ctrl-zto undo when your done, (ctrl-z = undo). So a summary of this, is that if you click on the selected brush. You change the grips. They toggle through these settings. First click = stretch, second click = rotate, third click = slide (see p21).
 That is what they do. You can practice that on your own. We're going to use what we've just learned in our next examples. Close this map, you do not have to save this one.
Now open your map from the last lesson. You should have saved it to your computer, like I told you to. If you did not, don't worry, you just have to go back to Lesson 1 and recreate the room. I'll wait for you here.
src="http://pagead2.googlesyndication.com/pagead/show_ads.js">
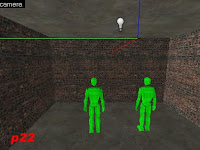
After you open your map, The first thing you notice, is that you can see your room in three of the viewport's but not in the Camera View. This is normal. Hammer always opens like this. We have to center the Camera View viewport by clicking on the view drop-down menu and going to "center 3-D views on selection". (You always have to do that.) when my map loaded I was facing sideways to the spawn points. Rotate your view around until you are behind them, like in my example(see p22).
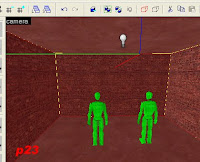
Click on the back wall (I mean the wall that the spawn guys are staring at). Oops, it selected all the walls of the room.(see p23) Because this brush was made from one single brush, so all six pieces are grouped together. I need to select one wall, not all of them. So we need to turn groups off, temporarily. To do this, click on the little button that says "Ig", that stands for Ignore Groups.(see p24). The proper name is "toggle groups ignore".
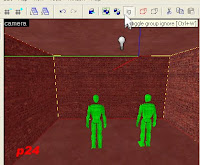 I'm not going to go through the trouble of calling it that. Just call it the Ignore Groups button. Click on the Ignore Groups button. When the Ignore Groups button is pressed. Hammer will ignore all grouped items. And You can select each item individually no matter which group it belongs to. I will teach you more about groups later. I Just want to teach you what you need to know now, to do what we are trying to accomplish now. To turn groups on, press the Ig button again, it should be pressed in.
Leave the Ignore Groups button pressed.(see p24) Listen carefully, I do not want to have to repeat myself. Sometimes it helps, to read things more than once. And it also helps, if you read them out loud. When you hear the words spoken, you understand them better. Then you start reading sentences. Instead of reading word by word. When you start reading sentences. You understand what you read better. Because when people speak, we speak in sentences. Not one word at a time.
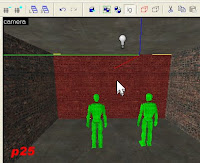
With the Ignore Groups button in the down position. Click on the back wall again, in the Camera View viewport.(see p25) it should have selected only the one wall that we clicked on. That's what you need to do if you try to select something and it selects everything. Just remember the "IG" button.
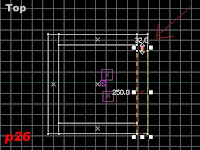
Now that we have our back wall selected, we are going to create a Leak. From the Top View viewport we're going to drag the wall away from the other wall to create a gap. Select a grip that is in the middle. On the long end of the rectangle.(see p26) and drag it from 300 to about 250. (It really doesn't matter if you are exact, we just want to create a gap.) it should look like my sample p27, in the Camera View viewport.(see p27)
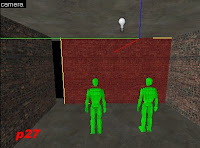
We're going to pretend, that we do not know that the hole is there. Let's say we finished our map and we're ready to Compile It. Click the Run Map icon.(it's the bicycle link). Click OK and compile the map.
The map will run, and play with a leak in it. And on a simple map like this, the problems are not as obvious as they will be when your map is full of stuff. A leak will cause your water not to show up when you compile your map. A leak will increase your compile time. A completed DOD map, might take in hour to compile. That same map with a leak might take 12 to 18 hours to compile, while Hammer tries to figure out where the inside of the map is and where the outside of the map is. Also leaks cause Lag.
Now back to our map. The leak in our map is very obvious. But when you start making real complicated maps. Leaks are not going to be to easy to spot. So what can you do to find your leaks? Lucky for you, Hammer has a tool we can use to find the leaks.

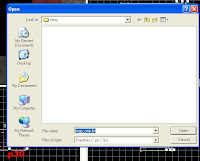
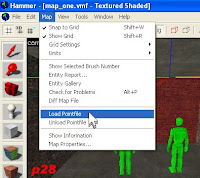 We have to load what is called a pointfile. Pointfiles are saved as .lin files, and they have the same name as your map except they end in .lin To load your point file click on the drop-down menu called Map.(see p28) Go down to where it says load point file and click on it. This is important for you to know. If you have a leak you see a msgbox(see p29). If you do not have a leak you will see a dialog box.(see p30). Since we see the MessageBox and not a dialog box that means we have a leak. And we should click yes to load the pointfile.
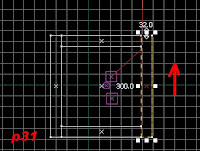
Loading the pointfile tells Hammer to draw a red line to show you where the leak is. And it draws this line in all the viewport's. Follow the red line until you see where it escapes from the inside of your map to the outside. Then you need to close that gap. So click on the Select Tool and select that wall that is too short. Using the grips, close that gap in the walls by dragging it from 250 units back to 300 units. (see p31)(note: if you can't get it to go back to exactly 300 it may be that your grid is too large and you should click on the icon to make the grid smaller, like I told you to do, in the first place .)
Now that we fixed our leak. We can unload the point file. Click on the Map drop-down menu, go to unload point file, and click it. Now that the point file is unloaded, we need to test our map again. So hit the run map icon. And compile the map.
src="http://pagead2.googlesyndication.com/pagead/show_ads.js">
Then go back to Hammer. And load the pointfile again. Click on Map. Then "load point file". If you still have a leak, (because in a large map there can be more than one leak.) Hammer can only show you one leak at a time. So if you have a leak. And your trying to fix it. After every time you compile your map you should load the pointfile. Fix the leak. Unload the point file.Compile the map. Load point file. Fix leak. Unload point file. Compile the map.......
Just keep doing that until there are no more leaks to load. If there are no leaks in your map, you will see a dialog box(see p30). You can just click cancel. If there are no pointfiles to load, then there are no leaks in your map. It does not hurt to check for leaks after you compile your map. A simple room like the one we created should not have any leaks. You only need to really check for leaks when you cut into a wall that is part of the box that contains your map. Or like if you expand your map. Like we're going to do today.
If you like you can take a break. You do not want to overload your brain. Check out the Music Break Room and listen to some music while you make maps.
Are you ready to get started now? Did you stretch your legs? Good. Let's start by adding a second room.
Continue on to the next lesson.



No comments:
Post a Comment