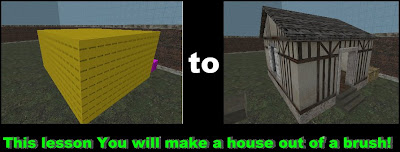
Lesson 4
"prop_physics" "copy and paste" "Make a House"
Welcome back, glad to see you are still interested.
I like the way the top of that wall came out. So I sliced the bottom also. I made the bottom and the top of the wall match.
A prop_physics is very similar to a prop_static. The difference is a prop_physics can be moved and or broken. A prop_static cannot be moved or broken. Examples of prop_physics are, wooden crates, wooden barrels, tables and chairs, pots and pans etc. etc.

To place a new prop_physics into your map, We use the Entity Tool. ( see p1 ) So we're going to select the Entity Tool, Then Select Prop_Physics from the Objects Pulldown Menu. ( see p2)

Now click in the camera view, ( see p3 ) use the top viewport so you can place it right where I placed mine. Notice how I lined it up with the spawn (see p4).

(the white dotted line I drew, for demonstration, it's not in hammer).
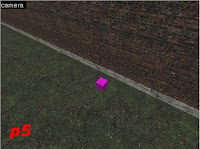
Zoom into the prop_physics in your Camera View viewport. (see p5)

Double-click on the prop_physics. In the objects properties dialog box select world model, then click browse. (see p6)
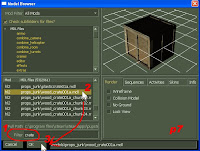
On the model browser, type "crate" in the filter. Then click on one of the names. Then you can use the up and down arrows on your keyboard. Scroll down to props_junk\wood_crate001a.mdl, select it then click OK. (see p7)
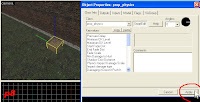
Then on the remaining dialog box, click apply (see p8).

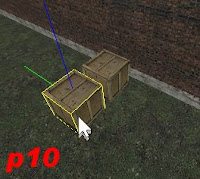
See how our model is stuck half-way in the ground. (see p9). All we have to do is hit ctrl-x, place the mouse about where we want the crate. Press ctrl-v. That places our model right on the ground. The cool thing about cut and paste is that once we have one model, all we have to do is paste. Place another box right next to that one. Just hit ctrl-v. (see p10)
You can take a break it right now if you want, and compile the map to check it out. If not, let's continue.
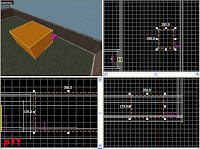
Select the texture tool. Click browse. Type tools in the filter. Double-click on the nodraw texture. Click the block tool. Go to the top viewport and Draw a brush 252x296. Then go to the side view viewport. And make it 175 high. (see p11)
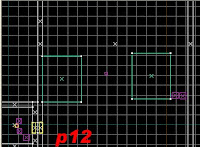
Using the shift and drag method. Make a copy and place it on the other side. (see p12)
Select the objects that you want to copy.
Hold down the shift key, drag it to where you want it. Let go of the mouse button before you let go of the shift button.
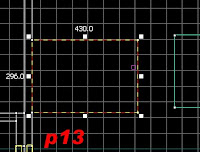
Stretch the new brush out to 430 (see p13)

Now go create a brush that we are going to use as a measure. So drag a third brush as I did in the example (see p14). Then use the grips and make it smaller about the same size as the crates.(see p14b)
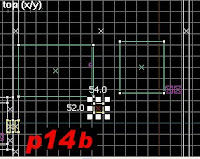 Go to the side view viewport, and drag it down to 24. We're going to make houses out of these two brushes and we're going to use the little brush so that we can carve the big brushes at 24 units high.
In the front view zoom in. (see p15). From the camera view, use the select tool and select the two large brushes. Select the Carve Tool. From the front view, draw your carve line across the top of the 24 unit high box. It enter to carve. (keep both sides)
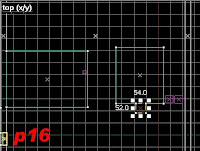
Now move that box next to the large brush, like in the sample. (see p16) zoom in and make sure it's lined up.
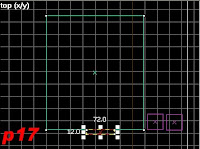
Then shrink it down to 12x 72 from the top viewport. (see p17).
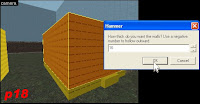
Select the large brush on the right. We need to make this brush hollow.(see p18) Click ctrl-h. This time are going to make the walls 16 units thick. Type 16 into the dialog box. Click OK.

Go inside the new brush, (see p19) click the "ignore groups" button, select the floor, hit delete, go back outside.
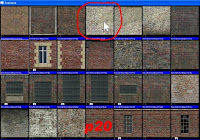
That piece that we deleted was an extra piece. We didn't need it. So we deleted it, and that gives us more room on the inside. Now I'm going to put textures on the outside, DOD style. Go to the texture tool, click browse, type brick. Select the white brick texture, called brick/brickwall002. (see p20)
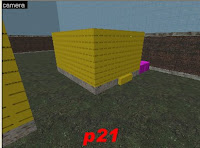
Apply that texture to the bottom part,( see p21 ) all the way around. While we have that texture active we might as well go ahead and do the other one also. You don't have to put the a texture on the side that is right up against the wall on the larger block.
Select the texture tool again. Click browse. Type wood. Scroll down and look for the texture called wood/wood_halftimber003. Double-click on it. And apply that texture to all the sides.(see p22)
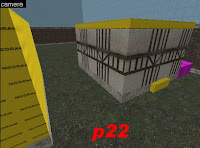 notice this texture needs to be adjusted. It is not lined up in a way that makes it look realistic.
Open the texture dialog box up. Select the texture you want to adjust. Remember you have to hold ctrl to select more than 1. Select the entire front face.(see p23) we will use the X and Y textfield, under Texture Shift. Do not touch those buttons under texture scale. The X button slides the texture forward and backward.

The Y button slides the textures up and down. Slide that texture over until it looks similar to mine. (see p24) after getting them centered on the x-axis.
We need to select all the sides and them up on the "y axis" (see p25)

Now we are going to do the roof. Select the roof. Change the height from 16 to 6. (see p26) Select the Carve Tool.
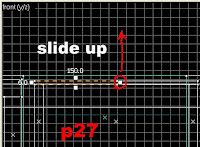
Carve the roof right down the center. Keep both sides. Select one side of the roof.
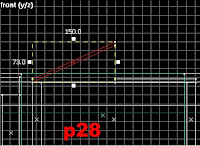
Go to the front view viewport, and click on it again until we get to the grips that allow us to slide. (see p27) Slide the roof up, from the middle, pay attention to the camera view.(see p28)
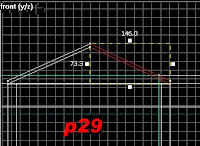
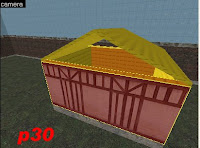
Do the other side of the roof. (see p29) Go to the camera view, select the two walls that have the opening above them.(see p30)
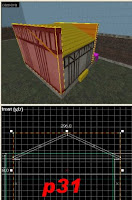
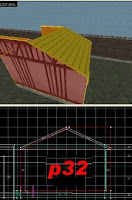
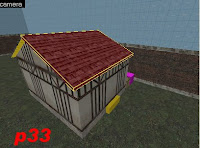
Drag them up flush with the peak of the roof.(see p31) then go to the front view in carve off the extra pieces. This time no need to keep both sides. You can let the top part be deleted.(see p32) cut the other side also. Remember you have to hit the select tool after your first cut, before you can make your second cut. Now that the roof is cut, go to the texture tool, click browse type roof. Select model/props_exteriors/roof, and apply to all the nodraw surfaces on the roof. (see p33) Do not worry about the inside yet.

Now select and zoom in on a little block that we put next to this house. (see p34) we are going to turn this block into stairs. To do this will work from the top viewport, and we will keep track of what we're doing in the camera viewport.

We want to drag/copy the block. Steps in DOD are usually about 8 units high. Remember this block is 24 units high. A divided by 24 = 3. So we are to going need three steps. The first block is already there. Copy 2 more. (see p35).
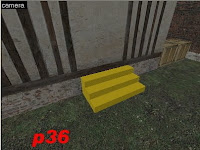
Now all we have to do is drag the steps down. Quite simple, drag the first one to 8, drag the second one to 16. And the last one you do not have to do anything because it's already at 24. (see p36)
To Texture the stairs we're going to try something different. Select all three steps with the select tool. Then click the texture tool. Click browse. Type conc. That is short for concrete. Then select a concrete texture. You can take anyone. I use the smooth one without much lines on it. Once you pick your texture , then click apply, on the texture dialog box. It paints all the sides at once. You can only do that when the textures we are applying, do not have to be lined up.
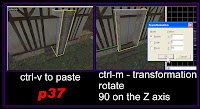
Now I copied one of the doorways from spawn.(I selected it, then I pressed ctrl-c, to copy) and I pasted it on the top step.(ctrl-v) But the spawn doorway is not facing the same way as our doorway. So we have to rotate the model. So here is one of those shortcuts that you need to remember. Hit ctrl-m. It brings up to transform dialog box. In this box you can rotate, scale, and move brushes. At this time we want to rotate. So we make sure that the button for rotate his pressed. And then we type how far we want to rotate on the z-axis. And we want to rotate 90 degrees. Type 90 next to the Z. Click OK (see p37)

Line up the doorway from the Top View viewport. Like we did when we created the spawn exit. Let just a tiny bit stick out of the wall. Select the wall and the doorway. Slice it from the TopView viewport, close to the edge of the model.(see p38)(Don't slice all the walls just the one we need to.) after you make the vertical slices, back to the select tool, select the doorway and the wall blocking the doorway. (see p39)

Then make your horizontal slice, close to the top of the doorway model just like in the example. After that, all we have to do is click on the part of the wall that is blocking the doorway, and use the grips to drag it down all the way.(see p40)

Now select a wood texture. And texture the floor of the house use "wood/woodfloor007a"
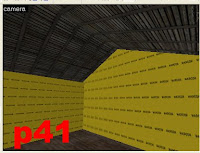
then select another wood texture, for the ceiling use wood/woodwall004b, texture the ceiling. (see p41)
For the inside walls use wood/wood_halftimber005 (apply it to the inside, you may need to line them up.)

Copy the light and the light model from spawn. And paste it in your house.(see p42) now we have light we need to add Windows.

I copied the doorway and pasted it to the back wall. Double-click on it, go to "world model", go to browse, type "window" in filter.
Look for "props_windows\inset_windowframe_large2_broken.mdl" Select it, click OK, click apply. (see p43) move the model into the wall. Make room for two of them, so put it to one side. Copy the model and slide it over.

Cut the opening for the window the same way that you cut the opening for the door. Cut the vertical cuts first then select the new piece that was cut, because you dont want to cut everything, this time there will be two horizontal cuts.(see p44) and instead of dragging the middle piece down, we just delete it. You can do the same thing for the second window. But I just changed the model to "props_windows\inset_windowframe_large2_shuttered.mdl" to make it look like that window was closed (if you choose to do that also, do not forget to put one inside or it will look weird) add windows on the sides, and you are finished with that house.
Do the same thing with the other house. Make it hollow. Delete the extra floor piece. Squeeze the roof part down from 16 to 6.
All right here is the different part.

After you drag the roof piece down to 6, You need to expand the roof in the "top viewport", to give your house a more realistic roof overhang.(see p45) Now you are ready to cut the roof.
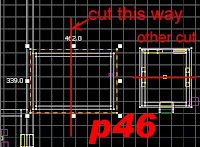
Cut this one at a 90 degree angle from your last roof (see p46) this would give your map a more realistic look. Finish making the roof the same way you did the first one.
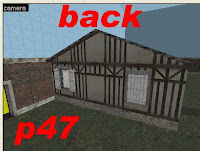
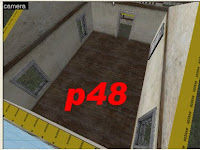
Put your windows and doors like I did in my example (see p47) and in this view I removed the roof, so you can see where the door and the windows are.(see p48) dont forget to copy and paste stairs and don't forget to put a light inside.
You did great! After you finish your map, run it and check it out.
Save this map for the next lesson.
GOTO Next Lesson


No comments:
Post a Comment