
The first thing we should do. Is click the "ig" button. So that it pops up.
In the Camera View viewport, click on any wall to select all of them. Press Ctrl-e. Not only does that center the selected item in the 2-d viewports, it gives Hammer an idea of the size that it should draw your next block. Meaning when we draw our next room it will be the same height as the one that was selected when we hit Ctrl-e. And it will be on the same level. So it will already be in line with the current room. You will understand more of that later. For now, in the words of the great Hiram, "Just Do It".

Now let's create a huge room for these dudes to run into. Turn the Ignore Groups button back on. Select the wall that these two guys are facing.(see p32) This lets us know which side we're going to draw the new room on. (see p33) we need some room on that side. Make room by using the mousewheel to scroll out.
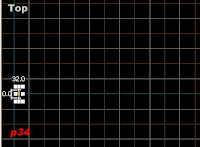
And then use the arrow keys to slide that thing over to the left.(see p34) now we have all this empty space to draw in. Let's draw a big room. Select the Texture Tool, click Browse, type Tools, double-click NoDraw texture, Select the Block Tool. In the Top View viewport, Drag a square 1601x 1010. (see p35)


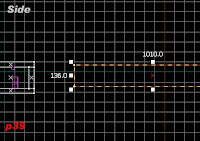
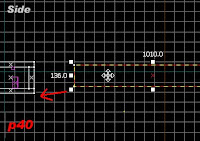
I also changed my camera view, so I can get a better perspective of what's going on.(see p36) Hit Enter. Then click the Select Tool. (see p37 & p38) now the huge brush that we just created should still be selected. If not click on it and select it. Hit Ctrl-e, to center the 2-d viewports. Up to this point, we have been working in the Top View viewport. Now we are going to work in the Side View viewport. (see p39). We need to line these two rooms up.(see p40) slide the new brush over close to the room.
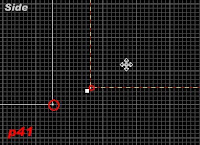
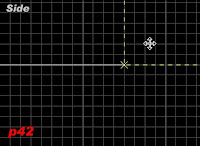
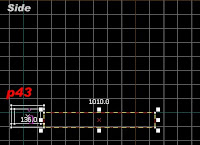
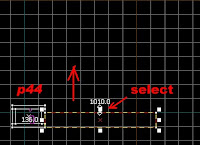
Zoom in with the mouse wheel as you get closer. So you can see the little white squares on the corners of the brushes behind the grips, little tiny squares.(see p41) We need to line them up.(see p42). After you get them lined up. Use the mouse wheel to scroll out.(see p43) we need to increase the height of our new brush. Select the grip in the middle, (see p44) And drag up to 775. (see p45) now we need to make it hollow. Hit Ctrl-h, thickness of 32, click ok.
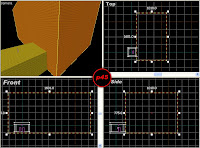
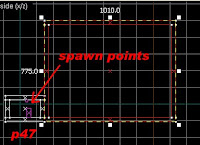
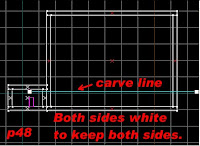
Fly to the inside of the new brush that we just created.(see p46) now im going to show you a little trick a shortcut to create a quick border around your map. Make sure the ig button is not selected. Using the selection tool click on any wall inside the new brush. It should have selected all of the sides. Now take a quick look at the side view (see p47) you can see the spawn points outlined in purple. We can use these to adjust the height at which we should carve our huge brush. The height of the purple square is equivalent to the height of a player. So we want to make the cut over their heads. Because the height of the cut, is going to be the height of our border wall. So with the new brush selected click on the Carve Tool. Select to carve just above their heads (see p48) make sure you "keep both sides". Click Enter. You can see in the camera viewport the line we just carved. That will be the height of our fence.
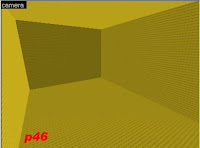
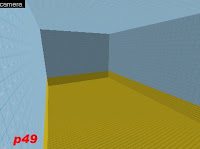
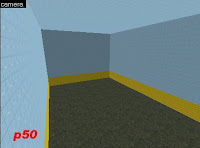
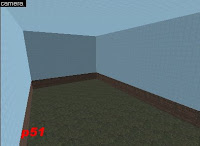
Now working from the camera view,(see p46) let's texture our new box. Click on the Texture Tool. Click browse. Type tools, look for the texture called Skybox. Double-click the Skybox Texture. Apply the Skybox Texture to the top parts of the walls and onto the ceiling. (see p49) Select the Texture Tool, click browse type grass. Double-click on a Grass Texture. I used nature/argentan_blendgrassdirt. Apply the grass to the floor. (see p50) Click Texture Tool, type brick, select a brick texture. I used brick/brickfloor001a. Apply that texture to the remaining no draw texture's on the inside. (see p51).
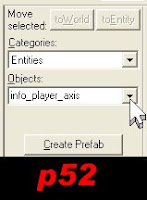
Now we are going to place sunlight. To do this and we will use the Entity tool. The tool that looks like the chess pawn. Click on the Entity Tool. Now we need to go to that box on the right called move selected. Where it says Categories: Entities, objects:.
(see p52) click on the pulldown arrow on objects, and go to "light_env". And select it.(see p53).

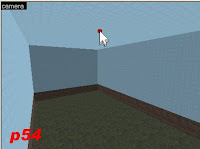
Go to the Camera View viewport. Place the entity into your map by clicking where you want the entity to be placed.(see p54). Now we need to change the properties. To get to the properties of this entity. Use the select tool. And double-click on the light_env that we just placed in the map.(see p55) The properties dialog box will pop up. On the dialog box,see where it says, "Pitch Yaw Roll(X.Y,Z)" . Click on "Pitch Yaw Roll(X.Y,Z)". After, you select that, notice to the right the three zeroes, and under that a button that says "point at"(see p56). This controls the direction of the sunlight. We need to make it point towards the ground. Like in the real world. So click the button that says "point at"
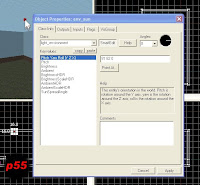

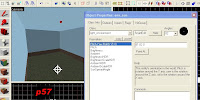
Go back to the camera view. Your mouse pointer turns into a scope target. Just click on the ground approximately under the light_env. Click apply. Click cancel. (see p57) Now go back to the entity tool. And select from the "Objects:" drop down menu "prop_static."(like you selected the light_env) Now we're going to place it in our map. I used my arrow keys on my keyboard to swing my camera view down. As you can see in the example.(see p58), Notice How I use my top view to place the prop_static in front of our spawn room. Place yours, like I placed mine. Now I'm going to swing my camera down to get a better working view.(see p59)

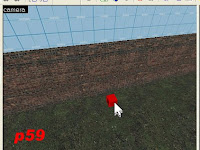
Click the "select tool" then Double-click on the prop_static. The properties dialog box should have popped up.(see p60)

Select "World Model" then click on browse. (see p60).
A model browser should pop up.
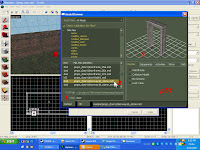
(You can right-click on the pictures and select "open link in new window", to see the enlarged pic w/out leaving this page.")
(see p61)
1. You need to type door in the Filter.
2. Scroll down the list until you find the door just like the one I selected in my example.
3. You can preview the model in the window marked No. 3 on my example p61.
(After clicking on one of the model names you can use the arrow keys to move up and down)
Once you have the same door selected, double click on it.
On the object properties: prop_static dialog box click apply. ahhhhhhh! magic. That little red box turned into a doorway. Before we close this property box let's change the collisions. Click on collisions. Change the use "vPhysics" to "not solid." This makes the doorway not solid. vPhysics makes its solid. Some things you may want to be solid, like tanks, and cars. And some things you don't, like doorways and bushes. Well some of the bushes you might want solid. But you should never made doorways solid, because people run into them, and get stuck. Make it "not solid", click apply, click cancel.
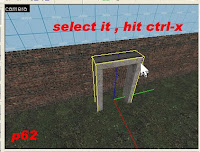
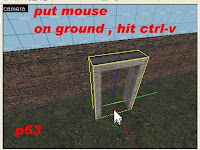
The door we just created, is partially stuck in the ground.(see p62) We need to line it up. You can line it up with the Select Tool, By selecting it, then using the "side view" or the "front view", to zoom in, and move it up, out of the ground. But a quicker way, Is to Use the Select Tool, select it, then hit Ctrl-x, it will disappear. You put your mouse pointer in about the same place where the model was and press Ctrl-v. it will paste it. And it will place it right on the ground.(see p63)
Now that we have it lined up vertically we need to line it up horizontally. We do this through the top viewport. Select the doorway model. Go to the top viewport. Then zoom in if necessary I should not have to tell you that. Move it next to the wall, keep an eye on in the camera view. We want to move it partially into the wall.(see p64)

Now comes the fun part. Turn the Ignore Groups button on. Now we need to select the walls that we're going to cut. And not the walls that we do not wish to cut. (Remember: to select multiple items, we hold down "Ctrl key"). So select the doorway, hold the Ctrl key down select the wall that we're going to cut. Here comes the tricky part. Fly into the spawn room and select the wall that players are staring at. Because we have to cut a hole in that one too. So that's cut them both at the same time. That way we know the cuts line up correctly.
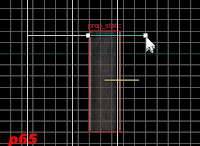
You should have selected the doorway, the wall that the doorway is touching, and the wall inside the spawn. Zoom in with the top view. Zoom in on the doorway. Select the carve tool. In the top viewport carve the wall close to the end of the door like in the example.
(see p65) Then do the same thing to the other side. It should look like p66. (see p66)
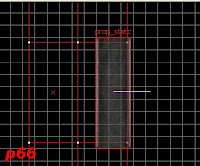
The vertical cuts are done. We still need to do one more slice. But we do not want to cut everything. We just want to cut what we have to. So we're going to use the "select tool," hit ESC, then select the door again. Hold down the Ctrl key and click the wall inside the doorway.(see p67) don't forget to swing around into the spawn, and select the door from this side.(see p68)
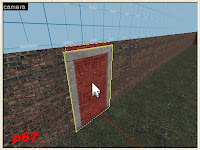
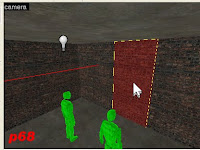
Once you select the doorway and those two wall pieces, zoom in, in the Front View viewport. Zoom into the top of the doorway, and slice that like you cut the sides of the door (see p69).
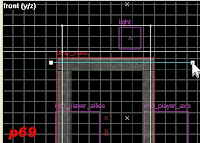
After you slice it, go back to the select tool, hit escape and select the part of the wall that is in the doorway like a brick door. Using the front view grab the grips, and drag that wall down to open up the doorway.(see p 70) Do the same thing with the wall that was behind that wall.
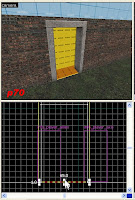
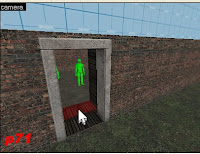
Go to the texture tool, click browse, type wood, and select a wood texture. I used wood/woodwall005a. Apply that texture to all the nodraw surfaces.(see p71) you are doing good, real good. Man, you should buy me a hamburger after this., Now to show you a quick way to get a model. If there is already one in the map that you want.
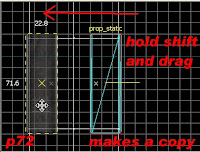
Click the Select Tool, select the doorway. from the top view viewport. Hold down the shift key, and drag the doorway to the other end of the hallway lift your finger off the mouse key before you take your finger off the shift key. This makes a copy. Without having to go through the dialog box.(see p72)
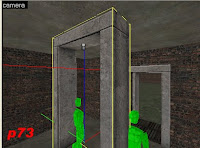 Select the door that we just slid over, Hit Ctrl-c to copy, hit Ctrl v to paste. Paste it on the ceiling near the light (see p73) then double-click on it, to open the properties. Select "world model", click browse, type "light_dome" in the filter, and look for "props_c17\light_domelight02_on.mdl". select that one click ok. Click apply. Click cancel.
Before you touch anything, you will notice that it is not lined up. You remember what we do. Simple we just cut and paste. It should still be selected already so all you have to do is hit Ctrl-x, to cut. Just do it. Put the mouse on the ceiling about where the light should be and press Ctrl-v.(see p74)
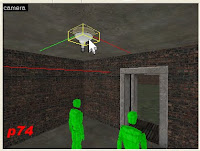
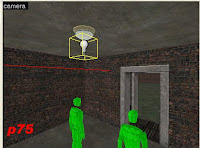
Now select the light bulb. Using the side view viewport and the front view viewport line up the light underneath the model just like I have it in the example.(see p75) Things you should know. The model by itself, will not light up the room. All the light comes from the light bulb.
Before you Compile the map, We have to change the default skybox texture. Valve, no longer uses that texture.
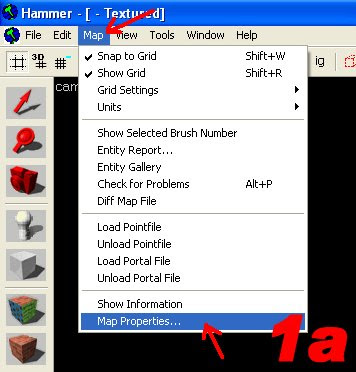
click on "Map", from the pulldown menus. Select, "Map Properties".(see 1a)
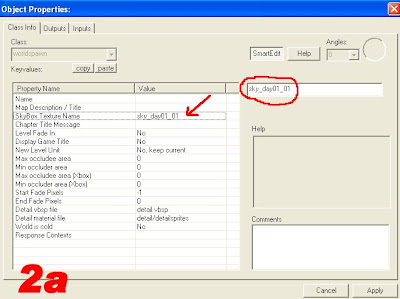
Click on the line that says, "Skybox Texture Name". Circled in red, where it says, sky_day01_01.....(see 2a)
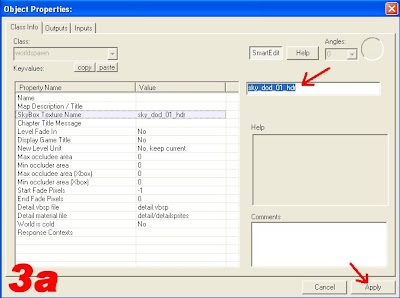
We need to change that value to say sky_dod_01_hdr. (see 3a)
That is the skybox texture that they use in Anzio.
So that one will be good for a long time. Click Apply, Click Cancel.
Now that we are finished, and you've learned a lot. Compile the map and run around into your new space. You can practice adding new models. You know how to add models but, Let me give you an example of something that could happen. Let's say you copy the doorway and paste it into the field. Then you changed the model to a tank. The tank would not be solid. Because the doorway is not solid. So if you ever have a model in your map, and for whatever reason it is not solid and it should be, just remember to double-click on it. Open the properties, click on collisions, and make sure it says "vPhysics" instead of "not solid".
Go ahead and experiment with adding new stuff, just type whatever you are looking for, then see if they have one. You know the kind of stuff they have in DOD. Just use your memory. Don't mess up this map though. Click "save as"and mess around in that map, save this one. So you don't mess up this lesson. you learned a lot. But I'm not ready to cut you loose yet. There is still a lot to learn. Like flags, spawn protection, and a bunch of stuff. Don't forget to check your map for leaks. I checked mine, and there were no leaks.
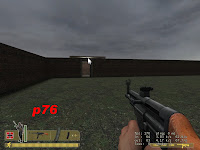
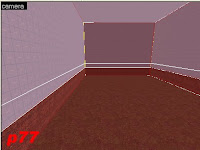
When I ran my map, I noticed I didn't make the wall high enough.(see p76) so i decided to fix it real quick. I went back to hammer selected the box again,(see 77) (you might have to take the ignore groups button off.) I selected everything, and made another slice a bit higher than the first slice. Then I applied a new texture.(see78) I chose a different brick texture for the texture at the top part of the wall. It gives it a different look.
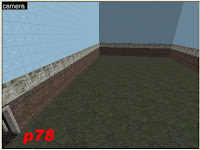
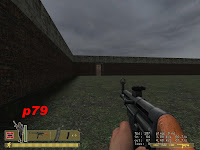
Yeah I like that better.(see p79)
Goto Next Lesson


5 comments:
So when applying textures, I can see the textures in 3D Textured typically, but not in 3D Shaded Textured, and they do not show up when the map is test run. However, I am just using standard grass and brick textures, like those used in the examples. Why aren't the textures being compiled into the map?
I can see the texture in 3D Textured and in 3D Shaded Textured.
Try using a different texture. What do you see when the map is compiled? purple checkers? or what?
They show up black. And it seems to happen at a certain point in construction because I can use a texture at the beginning of working on a map and there are no problems, but then I use it again later and it goes black. Even when I try other textures they don't show up, and I'm only using textures from within the game--grass from anzio, bricks08, etc. I'm using the new prefab config they put in for DoD, and wonder if it's just glitchy because it's new. I really don't know if it has something to do with selecting or ignoring grouping or... It's making me a little crazy.
Also, if it helps, sometimes the textures show up in 3D Textured but not 3D Shaded Textured.
I don't know what it could be. Go to your steam window. where you click on "source sdk" to open that one up. Right-click on "source sdk"
goto properties then click local files, at the top, then click
'verify integrity of game cache'
and do the same thing to day of defeat icon also.
Post a Comment